Figurative Modelling Part VI

 On the 28th of November, I had my 6th session in figurative modeling, today’s session was split into two parts, the morning half was a slideshow presentation about ceramic sculptures and the afternoon half was making a slip, wax, fabric, plaster colleague.

Ceramic presentation

For the first half of the day, we started off with a slideshow of ceramic pieces and what the artists were trying to represent in their work,

Here are some examples:

img_9334.jpeg

This Symbol of life and death

and Reflects loss

IMG_9336.jpeg                                                                   
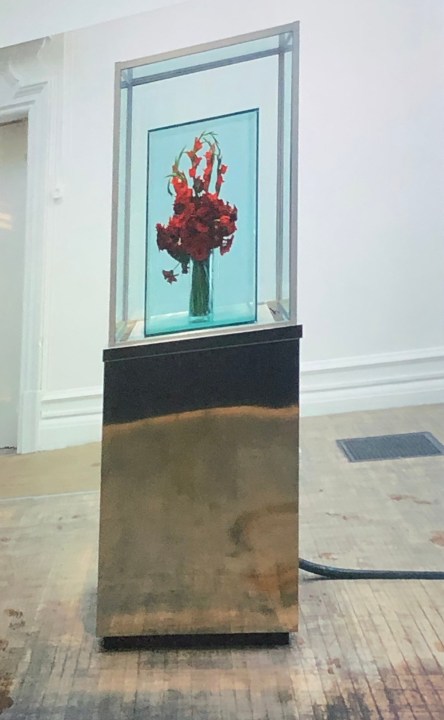
Donatello’s Mary Magdalene (1455)   

Wooden Sculpture


Ceramics Collage

For the second half of the day, we started making an art piece collage using most of our work projects from the past few weeks, while also adding extra materials to the piece such as leftover fabric, wire, and clothing, during this process we also were given the option to dip our models or materials into a bucket of liquid slip and even hot wax

When I was making mine, I just made it up as I went, adding layer upon layer of material, clothing, slip, and wax.

The general idea of this project was to sort of giving a visual representation of what our piece is about, In my case, I wasn’t fully sure where I was going with this, I think in future it would be best to plan it out step by step and even come up with an idea beforehand instead of “rushing into the action”, but in the end I was mildly happy with the end result, it looked interesting and looked as though it had a story, but still it would be best if I thought this through first, then the outcome would’ve been better.


Materials I used:

  • Face cloth
  • String
  • Needle and thread
  • Chicken wire
  • Pantyhose
  • Gloves
  • Miscellaneous fabric

UNADJUSTEDNONRAW_thumb_14fd s1KM06BRR1eYKOGvdivvAg_thumb_1500 IMG_9360IMG_9374


Heres a link to the video on my youtube channel that’ll show a little bit of the working progress.

Figurative Modelling Part V

On the 26th of November, I had my fifth Session in figurative modeling. This week’s exercises for life drawing and sculpting exercises.

Life Drawing:

Sketching

For life drawing, we did 10 of 10-second sketches, 10 of 20-second sketches, 5 of 1-minute sketches and 2 of 10-minute sketches.

IMG_9355

Life Sculpting

for the next part of life drawing we each took a lump of clay and did 2 of () minute sculptures of our model, after that, we did two of () minute life drawings of our models.

IMG_9301     UNADJUSTEDNONRAW_thumb_14df

Hand Sculpture

For the afternoon session, we sculpted hands, First, we took two lumps of clay and rolled them into bowl shapes, next using a bit slip to glue them together, this formed the base shape of the hand, next we took another lump each and sculpted the wrist.

img_9303.jpeg

Next, I rolled up bits of clay and formed the fingers, once all of them were attached, I started shaping the palm, the knuckles, the wrinkles, and the position, For the finishing touches, I covered most of it in white slip for the firing process.

img_9314.jpeg

Figurative Modelling Part IV

On the 21st of November, I had my fourth session in Figurative Modelling, for today’s session we were split into two groups for a morning and afternoon session, These included slab building and plasterwork.

Slab Building

For our first exercise of the day, we were to  make a slab collages, each slab including an aspect from one of our life drawings, for this we were split into groups of three and each of us drew certain parts of our life drawing sketches, we also made separate clay body parts to add to our collage (I made the arm)

Note: The idea for each slab drawing was to give it a 3D aspect to make each piece stand out

Plaster Stitch

For the final exercise of the day, we took our fabric limbs from the last two weeks down to the plaster room, before filling the body parts with plaster, I had to figure out the equal amounts of water and plaster I had to mix together.

Arm

For the arm, I mixed 1 pint and a half of water along with 1125 grams of plaster, once they were both mixed together I waited about a minute for it to settle before pouring the mix,

Once it was ready I poured the mix in the arm while it was drying  I made sure the mix would spill by hold the top part in place

Also while the plaster was getting gooey I moved the fingers around to make a “finger gun” gesture.

Once it dried up, I was happy with the result.

unadjustednonraw_thumb_14e4.jpg

Foot

For the foot measurements, I mixed 2 and a half pints of water along with 1875 grams of plaster, once mixed together and after a minute of it settling, I then poured the mix in the fabric, while it was drying I kept hold of the top to prevent spillage.

The end result wasn’t what I was expecting since it was too chubby and uneven and starting leaking at the bottom as soon as I poured the mix in, so I had to place something on top of the hole to stop the spill.

unadjustednonraw_thumb_14e3.jpg


Figurative Modelling Part II

On the 14th of November, I had my second session of Figurative Modelling, for the whole day, I and my class were sculpting heads, first, we started with taking terracotta clay and building a circular wall to act as a base, then I started building up layers of clay, working my way up the head.

img_9020.jpg

Once I built my way up to the chin I took a small piece of clay to act as support once the chin was in place, then I started building more upward to the face, for the nose I tore up small pieces of clay that helped form the shape.

IMG_9024

(Note: During the process, we were encouraged not to make the surface of our heads too smooth as it would increase our chances of them collapsing)

While making my way to the top of the head (like what I did with the nose) I took small pieces of clay and started building my way up.

IMG_9031.jpg

Once I sculpted the eyes, ears, lips and other facial features, I was finished and satisfied

(Note: the reason why I didn’t fill the head all the way to the top was both because there was a risk of it collapsing and also because I liked the way it looked).

img_9052.jpg


Figurative Modeling Part I

On the 12th of November, I had my first class on figurative modelling, To prepare for our induction each of us was tasked in printing out an image of a figurative model art piece that interested us, For me, I chose the work of Michael Flynn.

Introduction

In the opening presentation, we were introduced to multiple figurative model artists such as Harry Alley, Christina Cordova, etc, next, we were told to analyze the art pieces by artists we chose using the three identities such as A particular way of thinking about the ideas, a particular way of finding relationships between ceramics and a particular way of presenting outcomes such as curation, installation or photography.

Sculpting exercises

For our first exercise of the day, we were given pieces of raku clay and use it to create our own multiple sculptures of the body that helped find the thinking, finding and presenting of sculpture work. These included parts of the body, the surface of the human skin and textures.

IMG_8978

Hand Stitch Part I 

For the first half of the afternoon, we made a start on making our fabric plaster hands, For this week we had to trace our arms (only a centimeter wider) on the fabric, place a few pins to secure it in place, then I proceeded to sew around the tracings, once it was sewn, I then cut the arm out.


Life Drawing

For the final exercise of the day, we had a few life drawing exercises, This included 10 of 10-second drawings (these included the core lines, gravity, and notation of the body), 10 of 20-second drawings, (these included core lines, the undulation of soft flesh, and punctuation of what it feels like to be in the body) 5 of 1 minute drawings (these included core lines, softness and a different area of focus) and finally two five minute drawings (for each drawing, I had to focus on different areas of the body and to carefully consider the relationship between skeletal structure and skin qualities that surround it).


A few of my sketches:


Five Minutes                                        20 Seconds

img_8999-e1573665234507.jpeg    img_8997.jpeg

1 Minute

img_8998.jpeg

Entrepreneurship

For this assignment, I’ve been tasked with looking into the entre Comp Framework PDF, and Merrydown my least strong requirement in entrepreneurship and how I can improve and build on it

Click to access lfna27939enn.pdf

In this PDF, it listed out certain skills required when involved in entrepreneurship

these include:

  • Spotting opportunities
  • Creativity
  • Vision
  • Valuing ideas
  • Ethical and sustainable thinking
  • Self-awareness and self-efficacy
  • Motivation and perseverance
  • Mobilizing resources
  • Financial and economic literacy
  • Mobilizing others
  • Taking the initiative
  • Planning and management
  • Coping with uncertainty, ambiguity, and risk
  • Working with others
  • Learning through experience


For me, my major weakness has to be vision or spotting opportunities since I don’t think I have much of an idea to offer for entrepreneurship, and as an artist, I don’t see myself creating multiple copies of one art piece and selling them to random people as I feel it would be a bit repetitive, but instead, I believe the better idea for me would be doing commissions for friends, family or people that they know and for each I make them something unique and/or even personal for them.

For example:

  • One of my favorite activities I enjoy doing in my free time is drawing, mainly characters from movies, tv shows, comic books, and video games, sometimes I even draw my own idea, a lot of my friends and family are aware of drawing of how good they are, and in the past, I have done personal drawings for my friends, mainly as gifts for birthdays, Christmas or any other special occasions, If I were to do drawings for certain people, all they’d do is contact me, let me know what they want to be done and give me details that they want for them, then I once I’ve finished it, I think of a price based the quality of the drawing and then come to an agreement.


A few of my drawings:

IMG_8940 2IMG_8939 2

IMG_8938 2


  • Another thing I enjoy doing is painting custom LEGO Minifigures, like my drawing I base them off characters from movies, tv shows, comic books, and video games and on occasion, I make Minifigures based on my friends or family by either request or as a surprise gift, and over the years I’ve been making these figures my skills have gotten better, I would sculpt 3D elements to them and even use other materials for the design, so like what I said about the drawings and how I’d do commissions, basically it would work the same way, the person (family/friend) would make a request, I’d gather the materials and paint the parts, sculpt some areas and put it together and come up with a reasonable price.

Here are a few of my Mini-figures and concept art:

IMG_3996  56936672557__d48f7130-4ff9-463a-b8a6-3bd98a4c1137.jpg  56504816704__65D36809-08CD-4304-AA84-ED5B091D426E 2

56902803316__70861D2E-1835-4FB9-A382-986D35D5D44C


My Final B.A.M.S design idea

Posthumous Success

For my final BAMS design and idea I’ve picked certain aspects from Edward D Wood Jr’s movies, My final design choice was this:

IMG_8914.jpg

The design is based on his movie “Plan 9 from out space”, particularly the scene when flying saucers are flying around Los Angeles.

There is also another design I sculpted and cast, this one was based on the poster for ‘Glen or Glenda’

img_8916-1.jpg

The reason I chose these two particular designs is that both these movies Ed Wood made had a big connection to him.

Glen or Glenda

Glen or Glenda was basically about a man transitioning into woman, the reason he wrote, directed and starred in this movie was because in his free time he liked to dress in women’s clothing, this wasn’t because he himself was transgender, it was because he liked it, so he knew what it was like to keep such a big secret from everyone, so he wanted to capture that into his movie to give people a sense of someone having a duel identity.

Plan 9 from outer space

Way before this movie was made, Ed Wood met and befriended famous Hollywood legend Bella Lugosi, (who is most famous for playing Dracula in the 1931 movie of the same name) for years Ed wood got him to appear in a few in his movies such as Glen or Glenda and Bride of the monster, he agreed to star in these was because he left Hollywood studios due to being blacklisted, meaning he had no choice but to accept every part and script he was given and because of this he didn’t want to sell out, so whenever Wood offered him a part in his movies, he’d say yes, but this time by choice.

A few years before Plan 9 was made Lugosi and Wood filmed footage of Lugosi picking flowers and mourning, this wasn’t really scripted or plan for anything, Ed Wood then wrote the script to accommodate all the footage shot in a cemetery. In 1956, Lugosi passed away at the age of 73, so when Plan 9 was made, Wood wanted to include this piece of footage of Lugosi to pay tribute to his friend.


Conclusion

Even though he wasn’t a brilliant filmmaker, his motivation and perseverance was impressive, his work was laughed at and unappreciated but he didn’t care, one of his movies Plan 9 From outer space is considered to be one of the worst movies of all time, but to him, it was his pride and joy, so this project isn’t about ripping into his work or expressing my own personal opinions about it, it’s about admiring someone did what he enjoyed doing for a living and honouring his memory, for him it didn’t matter that no one liked his work, the work was his and was something to be proud of, and what’s also impressive is that he wasn’t alone, he had a bunch of friends and even a few celebrities to help him out by either acting or working behind the scenes, they didn’t care if the movies were bad, they just wanted to help support his passion, just like I want to support and honour his legacy.


Final Design Sheet

IMG_9548

Medal Making process

On the 10th of October, I started process on my medals first I created oven bake plasticine models ( the key for these was to make certain parts of the model slightly three dimensional) Next I put them in the oven for 15 minutes at 130 degrees. Once all the models were hardened I then took them down to the wax room and made blue latex molds to make experimental wax medals, once the molds were prepared I poured in the hot wax and waited for about an hour for them to dry.

The Front

For the design of the front, I would model it from a certain element of one of Ed Wood’s movies (e.g poster design or scene), The two designs I made were based on two of his most famous movies: Glenn or Glenda (1953) and Plan 9 from outer space (1959). For Glenn or Glenda, I modeled the design based on the poster, where it shows a half man half woman person with a question marks all around it to emphasize the plot of the movie (which is a sex change flick).

For the layout of Plan 9 from Outerspace I sculpted a view of Hollywood hill and placed three flying saucers hovering over the city (for each saucer I’d draw a line on top of them, indicating that there really on stings and not really there, this is a reference to how bad the special effects are.

The Back

For the back, I chose a specific quote that relates to post humorous success, Ed Wood’s work and how it was seen. The quote I picked was from John Stoan

Quote: “What difference does it make whether your work is appreciated or not? The work will still be yours anyway, most of us are only appreciated after we are dead”

The Silicone Molds

To create the silicone molds I had to create a support out of plasticine and placed the model in the center of the support, then I cut up some pieces of thin sheet metal to act as barriers and to prevent the silicone from leaking. Once I mixed up the right amount of silicone and pigment, I then poured it onto the mold and using a back massager to get rid of the bubbles. After 24 hours, the silicone was dried and I was able to pull the model out of the mold, so then I started pouring in the hot wax, the results were slightly better in detail and quality.

IMG_8681