What I have chosen to focus on for my locus project is to showcase all my practical effects and movie props into a short movie
Title:
Sam and Ewan vs Everyone
Plot:
The plot is basically me and my friend Sam out of nowhere going insane and on a rampage, slaughtering our classmates in ridiculous gory fashion.
Practical Effects (in order):
- Throat slit
- Knife throw
- Heart ripped out of the chest
- Gunshot Wound
- Neck Snap
- Head Stomp
- Eye Stab
- Hole in the chest
- Face Slash
- Stunt Dummy
- Gunshot to the head
- Stunt Dummy (Again)
Production Process
- First I’ll write a list of practical effects to use in the movie and then draw designs on how to build and pull them off.
- Once all the effects are sorted out, I’ll draw a first draft storyboard of the whole movie and even time each scene based on how long I want the shot to last for.
- I’ll conduct a series of tests on each effect, testing various materials and techniques, this is so I can be prepared for when we finally make the movie so we can know what to do at certain times
- For each effects test, I’ll buy the right props and equipment for each test and even make a test video and each one will go to my youtube channel.
- I and Sam will go round our group (or possibly around campus) and ask any friends or classmates to partake in the movie, mainly as a victim in the movie
- To prepare each actor for the scene they’re partaking, I will sit down with each of them and go through what I want them to do, how they’re going to do it and walk through the procedure of the effects that are going to happen to them (if they’re playing a victim)
- If necessary I and Sam will book filming equipment to use to help in our production and even ask classmates (not partaking as an actor) to help out behind the scenes
- We’ll film each scene in the right order, except for the beginning which will be done last
- After each shot, I and Sam will look over the footage and see if we’re satisfied
- I will do the editing, put each scene in the right order and adding in the right sound effects
- I will show the whole movie to the cast and crew
- I will prepare for the final show by planning to premiere the movie in a dark room for people to watch and even make posters and trailers to advertise the movie
- After people watch the movie, they’ll see all the props on display with screenshots from the movie
Cast and crew:
Sam Cottadiyil Issac (Himself and Co-director)
Ewan Gill (Himself, Co-director, writer, editor, FX artist, storyboard artist, producer, makeup artist)
Anonymous Camera operator
Victims (in order):
Megan Atkins (Throat slit Victim)
Caitlin Norman (Knife in the head Victim)
Emma Don (Heart rip Victim)
Helen Coulton (Gunshot Victim)
Alex Smithson Swain (Neck snap Victim)
Megan Evans (Head Stomp Victim)
Peter Korakakis (Eye rip Victim)
Martha Tambini Cooper (Armchop Victim)
Emma Don (Hole in the chest Victim)
Abbie Evans (Face slash Victim)
Daniel Jones (Gunshot to the head Victim)
Actors (not victims)
Alis Joscelyne (photographer)
What is the movie supposed to be like?
It’s supposed to be violent, but with a more comedy theme with over the top effects, nonsensical action, and (if we’re lucky) intentionally bad acting.
I want it to be a movie thats supposed to be stupid and over the top, while it has a dark theme showing two students mindlessly killing people, I don’t want people feeling disturbed watching, I just want people to enjoy the silliness of it and appreciate the practical effects and techniques I used for it.
A perfect source to compare this to, one with the same idea, a dark setup but a funnier delivery.
This video is titled “The Slap Part 2”

 Next, I took the glass and drew the right measurements of each piece on the glass then using a glass cutter I cut out each piece and arranged them in the right order, next I took some thin wire, cut it and used it to create the details in the fingers and thumb and using glass glue to secure them, next I cut more pieces of glass identical to the original pieces and glued them on top, once they were fired in the kiln I was able to hook the fingers on the hand. I was happy with the end result.
 I was pretty happy with the end result.
 (Me and Dummy)
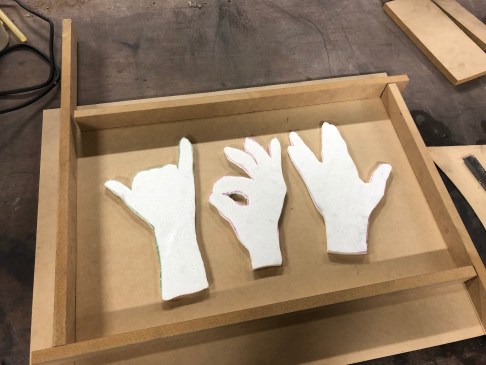


 (My Collage)

