On the 26th of March, I started working on a knife being thrown into the head effect as part of my locus and movie project.
Shopping list:
Two plastic knives
Thin copper wire
With blood:
Plastic syringe
Tubing
Fake blood
The Knife
First I started by cutting one of the plastic knives in half and drilled a small hole at the top end of the blade, next I took the copper wire and hot glued the end of the wire to the end of the hole, next I bent the wire around my head and held it in place (using paper clips and covering my hair with a beanie).
The Test Video
For the first shot, I had my friend Sam holding the knife without throwing it. So I had him look like he was about to throw it, then the camera quickly panned out to an empty space.
2. For the second shot, I had Sam make a similar move to the one from the previous shot, but without the knife, then he pretended to throw the knife and the camera panned to me wearing the wire knife, then I blended it all in editing.
The Blood Version
For the blood version, I took a plastic syringe and tubing and hot glued the tubing to the wire and attached the syringe (filled with fake blood) to the tubing, the result was pretty decent.
What I have chosen to focus on for my locus project is to showcase all my practical effects and movie props into a short movie
Title:
Sam and Ewan vs Everyone
Plot:
The plot is basically me and my friend Sam out of nowhere going insane and on a rampage, slaughtering our classmates in ridiculous gory fashion.
Practical Effects (in order):
Throat slit
Knife throw
Heart ripped out of the chest
Gunshot Wound
Neck Snap
Head Stomp
Eye Stab
Hole in the chest
Face Slash
Stunt Dummy
Gunshot to the head
Stunt Dummy (Again)
Production Process
First I’ll write a list of practical effects to use in the movie and then draw designs on how to build and pull them off.
Once all the effects are sorted out, I’ll draw a first draft storyboard of the whole movie and even time each scene based on how long I want the shot to last for.
I’ll conduct a series of tests on each effect, testing various materials and techniques, this is so I can be prepared for when we finally make the movie so we can know what to do at certain times
For each effects test, I’ll buy the right props and equipment for each test and even make a test video and each one will go to my youtube channel.
I and Sam will go round our group (or possibly around campus) and ask any friends or classmates to partake in the movie, mainly as a victim in the movie
To prepare each actor for the scene they’re partaking, I will sit down with each of them and go through what I want them to do, how they’re going to do it and walk through the procedure of the effects that are going to happen to them (if they’re playing a victim)
If necessary I and Sam will book filming equipment to use to help in our production and even ask classmates (not partaking as an actor) to help out behind the scenes
We’ll film each scene in the right order, except for the beginning which will be done last
After each shot, I and Sam will look over the footage and see if we’re satisfied
I will do the editing, put each scene in the right order and adding in the right sound effects
I will show the whole movie to the cast and crew
I will prepare for the final show by planning to premiere the movie in a dark room for people to watch and even make posters and trailers to advertise the movie
After people watch the movie, they’ll see all the props on display with screenshots from the movie
It’s supposed to be violent, but with a more comedy theme with over the top effects, nonsensical action, and (if we’re lucky) intentionally bad acting.
I want it to be a movie thats supposed to be stupid and over the top, while it has a dark theme showing two students mindlessly killing people, I don’t want people feeling disturbed watching, I just want people to enjoy the silliness of it and appreciate the practical effects and techniques I used for it.
A perfect source to compare this to, one with the same idea, a dark setup but a funnier delivery.
On the 29th of February, I started work on my silicone hand, first I had to measure the right quantities of water and alginate for the mold, next I had to create a container for my hand and alginate so I made one out of old milk cartons and it taped them together
next once the water and alginate were mixed up I poured the mix into the container then I placed my hand inside and waited for the alginate to dry, after 13 minutes I managed to pull my hand out of the mold, for the fake bones I found some old wooden sticks, snapped them, sanded them circularly, sprayed them white and stuck them together.
Next, I mix the silicone with red pigment until it turned pink, once it was ready I poured the silicone in the mold and made sure that there weren’t too many air bubbles, then I placed the bones in the correct place. After 24 hours I cut the container open and Tore off the alginate after cutting the excess silicone off the hand it was done, I was pretty happy with the end result.
Then on the 3rd of June, I began progress on a new and more realistic hand, to give it a better color I bought a silicone pigment in flesh tone, so then I did the same process as last time with the alginate, then when I mixed up the silicone with the new pigment and poured it into the mold and just like last time placed some “bones” inside, after 24 hours I took the hand out of the mold, this hand was shorter but I felt it was a huge improvement from the last one and looked freakishly realistic.
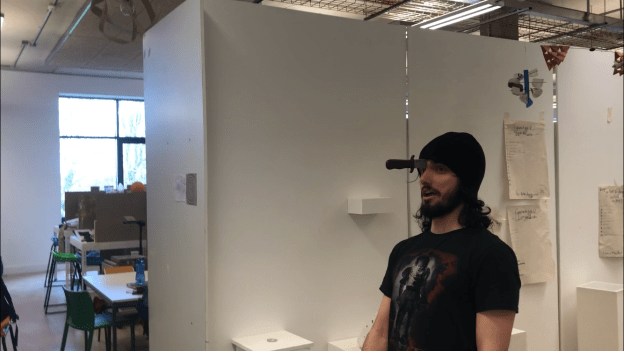
On the 21st of February, I started construction on my stunt dummy as part of my locus project.
Shopping list:
A long sleeve black shirt
My old pajama pants
old socks
cheap rubber gloves
an old grocery bag
Old newspaper
A lot of duct tape
The torso
For the torso, I wore the black shirt and gloves and covered myself in duct tape as tightly as possible (except for the elbows), I also taped the gloves on. to remove the shirt I cut along the front then I taped up the semes.
The legs
For the legs I wore my old pajama pants and socks and covered them in duck tape with the socks attached (except for the knees) remove the pants I cut along the sides and I taped up the seams.
The head
For the head, I wore an old grocery bag on my head and tape around the forehead and chin and managed to pull it off.
Assembling the body
Once each body part was made I tipped at the seams filled with newspaper and Taped each section together, then dressed the dummy in my clothes
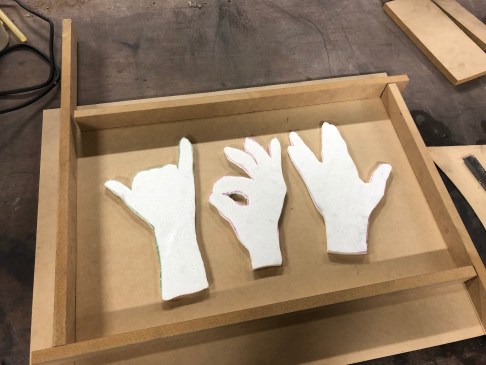
On the 12th of February, I started aluminum casting. First I was given a tutorial on how to create sand molds. Before casting I had to measure the object I was casting,(I cast both my polystyrene and foam-core poster board hands)
Next, I had to create borders to surround the object and hot glue them in place, next I had to create the sand, for this I had to mix 700g of silicate binder and 14kg of silica sand and mix them using a mixer, once I mixed it just right I poured the mix into a container,
Next, I started filling in the borders with sand, once it was completely covered I had to make sure the top was completely flat.
Next, I used a tank of co2 to make the sand solid and even poked holes in so it can surround the inside, then using a coin I carved in small circles on two edges to prepare for the next pieces, I also created a smaller sand mold, this one was for to pour the metal into, by building a smaller border and a plastic cup I was able to create a smaller mold to glue to the top
Next, I flipped the pieces onto the other side and covered them with sand and sprayed co2 on them, next I took both pieces, covered them in graphite and lit them on fire.
Next came the pouring to do this we had to heat up the aluminum and wait until it got to 1200 degrees, then I gently and quickly poured the metal into my molds and waited for them to cool down.
Finally, the day came for me to break the hands out of the molds by breaking apart the barriers and molds, I was pretty happy with the end result.
On the 4th of December, I started experimenting with spirals for this drew various spirals out on tracing paper and cut them out and test the LED and shadow effect.
To create a final spiral design I took some strong wire to build a support structure, next I took a long piece of wire and made a long spiral and glued tracing paper around it and glued small spirals on it, next I hooked it to the support structure, then I managed to place the LED inside and wrap the positive and negative wire around the neck of the support, once the wires were connected to the transformer I managed to create a spiral shadow from the bottom.
On the 5th of December, I started creating another light
For this one, I decided to go with a more simple shape, so I took some coffee sticks and glued them together to make a cube next I covered each side with tracing paper, next I took it to the spray room and sprayed it blue. I then spot welded a support frame to hold the LED in place, next I put the frame in place then fed the LED and wires through.
Once the cube itself was finished then built a small podium for it to sit. First I took a few pieces of wood and decided how tall I wanted each side, next I cut the wood, for the top part I cut a smaller square so I could fit the wire through and cover it with the cube itself, next I took a drill and screwed the sides together, then I sprayed painted it grey, once everything was completed I placed the cube on the podium and connected the wires from to the transformer and it lit up.
The design and name is based on a movie artifact from various Marvel movies
On the 22nd of November, I finally created a use for my wooden box I made two months ago, I decided to use it to store my equipment for writing, crafting and designing instead of just leaving them scattered around my desk
First I chose different kinds of equipment I could put in there first I wanted to store my locker keys in there, so I took a center punch and pierced a tiny hole on the inner part of the top of the box deep enough for the wire to fit in and superglued it in place, I used wire to create hooks and suspenders, The Hooks are bent in a specific way so the keys/paperclips still tangle even when the box is closed and will suspend the super glue, tape, and spirit gum
For the inside of the box, I decided to create unique sized barriers to store more items, for this I used cardboard, I measured it, cut it and tucked it into the box and glue it in place (I would mainly place in these barriers around the object I put in place).
The Hooks are bent in a specific way so the keys/paperclips still tangle even when the box is closed and will suspend the super glue, tape, and spirit gum
As for the top of the lid, I decided to glue on my leftover enameling piece in the shape of the Avengers logo.
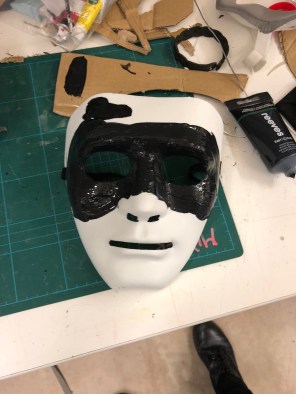
On the 15th of November, I started work on my superhero mask
Here are the things I used:
Smooth white mask
Liquid Latex
Black acrylic paint
Paintbrush
Baby powder
Spirit Gum
And crafting knives
First thing I did was mix the liquid latex with the black paint until it was the right color
Next, I used a paintbrush and painted the mix on the white mask, to get it at the right thickness I had to build it up in layers, so between each layer, I had to wait for it to dry
Once I got up to 10 layers I carefully started to peel the mask off, then I applied baby powder to the front and inside of the mask to prevent it sticking together (If you peel it off too fast or don’t apply enough powder the latex mask will tear)
After I peeled off the mask I used my craft knife to cut it into the shape I wanted
Next, I then proceeded to stick the mask to my face, first I applied some spirit gum to the mask, then I stuck it onto my face (I had to stretch it to some areas so it would look like it’s attached to my face also so it can move with my face emotions)


 I was pretty happy with the end result.
 (Me and Dummy)